Like many good stories, this one starts at The Met Cloisters, Fort Tyron Park, New York, NY.
The day following the coronation of Ozurr the Boot-Giver and Fortune Sancte Keyne, Ástríðr and I joined several others including our Baron of Stonemarche, Keziah Planchet as well as Olalla, Iddo, and Ezekiel to the fabulous Met Cloisters Museum. Among the many items of inspiration from Unicorns and Horns, to Architecture and Furniture, one item, in particular, jumped out. The simple, yet not so simple, box.
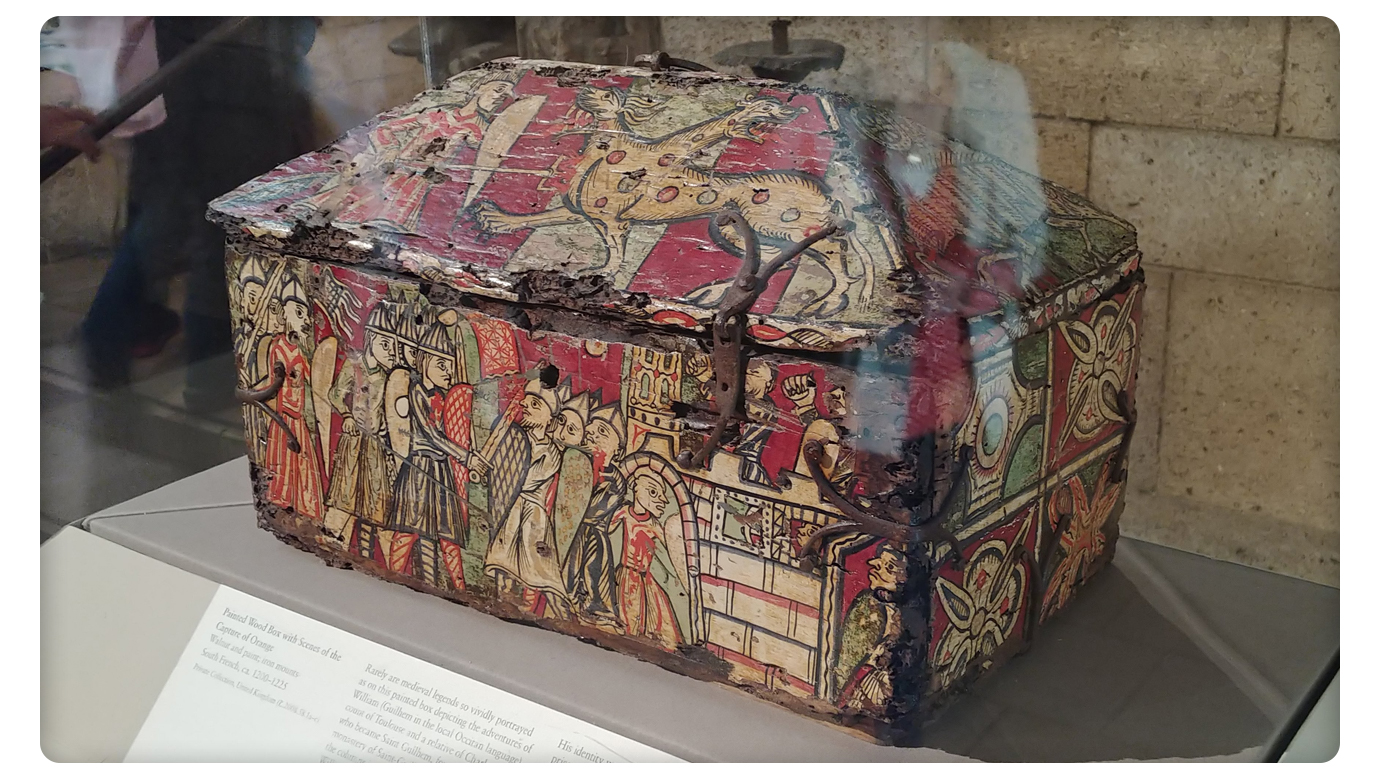
Sometimes called a cofferette, a chest, a hutch, a reliquary… it was one of these containers that Baron Keziah ² implored I make for her so that she could embellish with paint. Well, the truth was I had planned to make one anyway and despite all the teasing going on on the book of faces (#notabox), the following day, planning would begin.
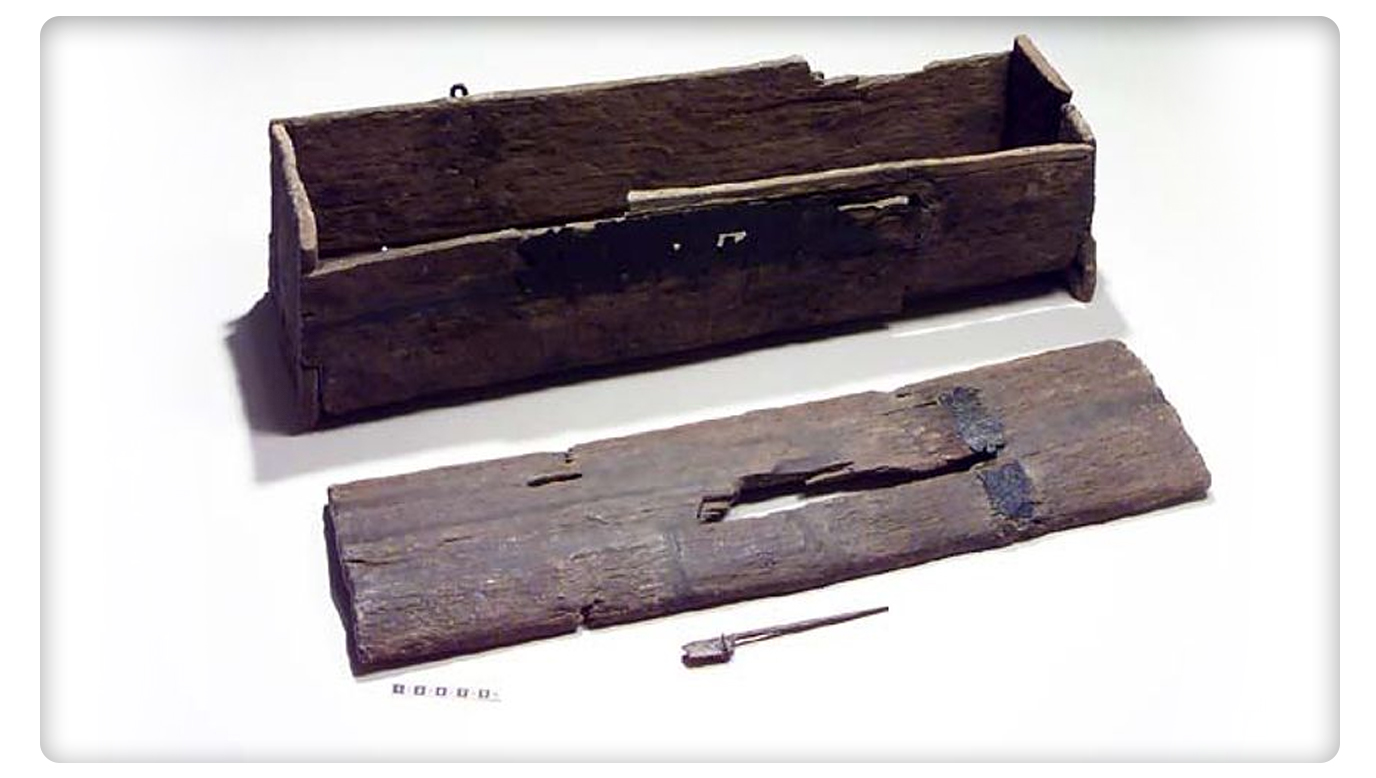
I had been researching the different types of medieval chests previously and for this first one, I would make a six board box. This style has been around for quite some time. The joinery is simple but does require nails or some sort of hardware to help hold it together. The Viking Mästermyr Tool Chest ² is a good example of the type.
The Design: As its name would suggest, the box is made of six pieces of wood; a top, bottom, left, right, front and back. Meridian School of Carpentry’s ⁴ first project just so happened to also be a box of this type. I would adapt that project slightly in size and use only hand tools to construct. A night spent watching videos about furniture design, the golden rule, Fibonacci, and tool making helped figure out the size and placement of the nails and hardware.
The Wood: I chose a piece of 1 x 6 ‘Select Pine’ lumber from my local big box store. I took some time to find a piece that was as free from warpage as they had. Pine was going to be easy to work with for this first project. It did chip and tear out in a few places as I expected and I will need to use a bit more care in the future. I hand cut the six pieces to length and used the hand plane to flatten things up. I was going to use the saw I had made but I may have snapped the string by over tightening it and chose a different saw.
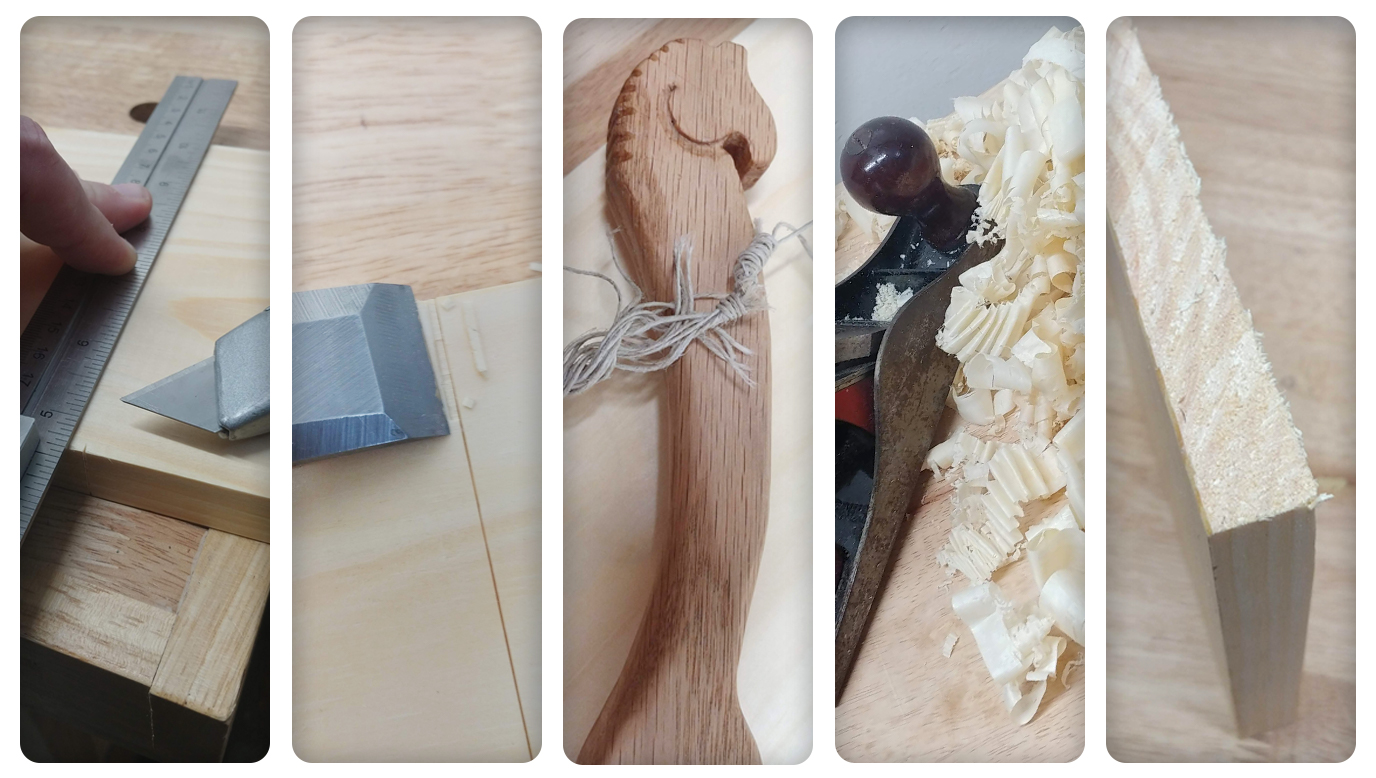
The bottom of the box had to be sawn lengthwise (ripped,) to sit within the sides. I planned to cut a dado (a slot) in the left and right pieces to hold the bottom and in hindsight, I should have done the same on the front and back. The dado was cut using a hand saw on either long side, and a chisel to break out the waste. I used blue painters tape to label each piece as I went along.
When I dry fit the pieces together I found that the front piece was shorter than the others and I ended up trimming the other three sides to bring things much closer together.
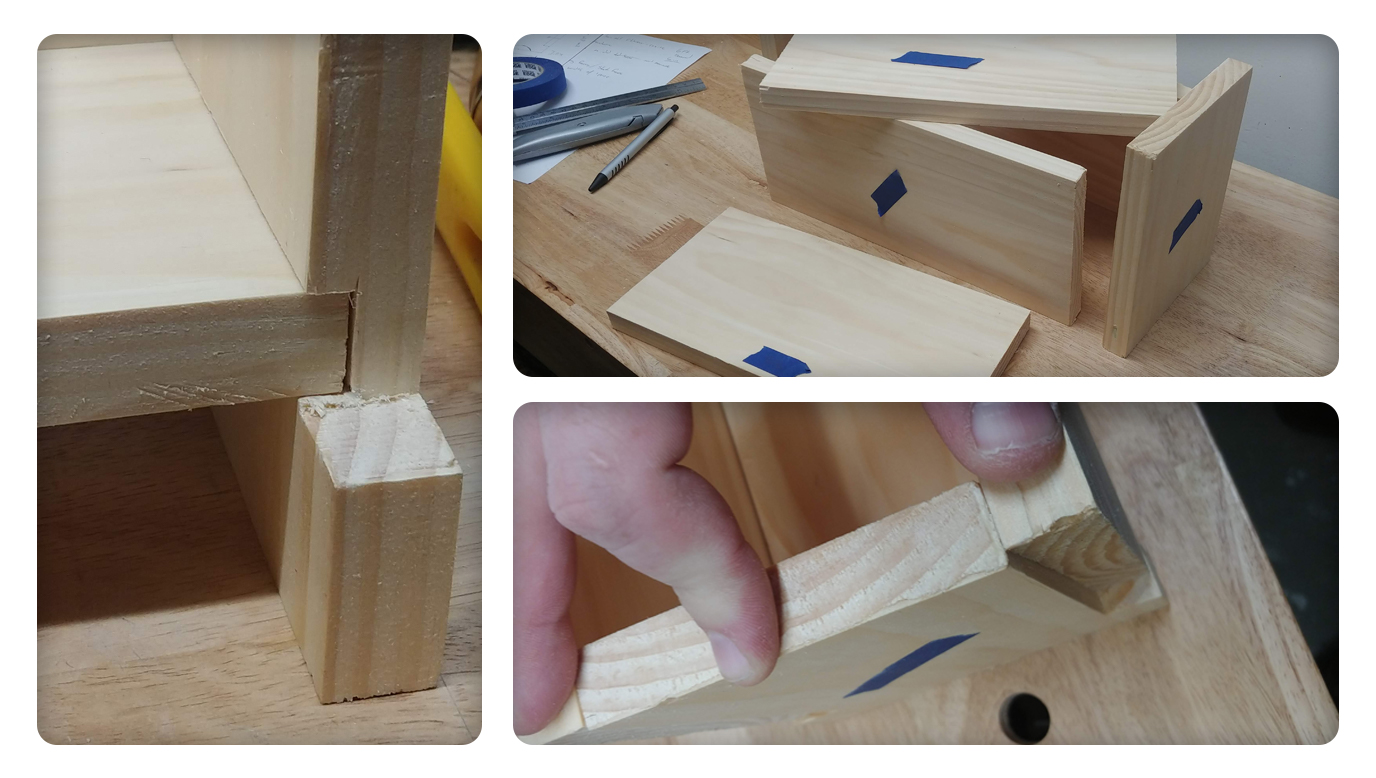
I laid out a curve on the sides to form the legs. This would help the box sit well and formed another unintended bonus. To cut these I sawed straight from the edge to the curve in several small sections and then used a sharp chisel to cut out the waste. Skipping ahead for a moment, after the box was together, I noticed that every time I would pick up the box, I found my fingers reaching under this curve to use as handles. That said, it was far too small at first so I opened each radius up to fit much better.
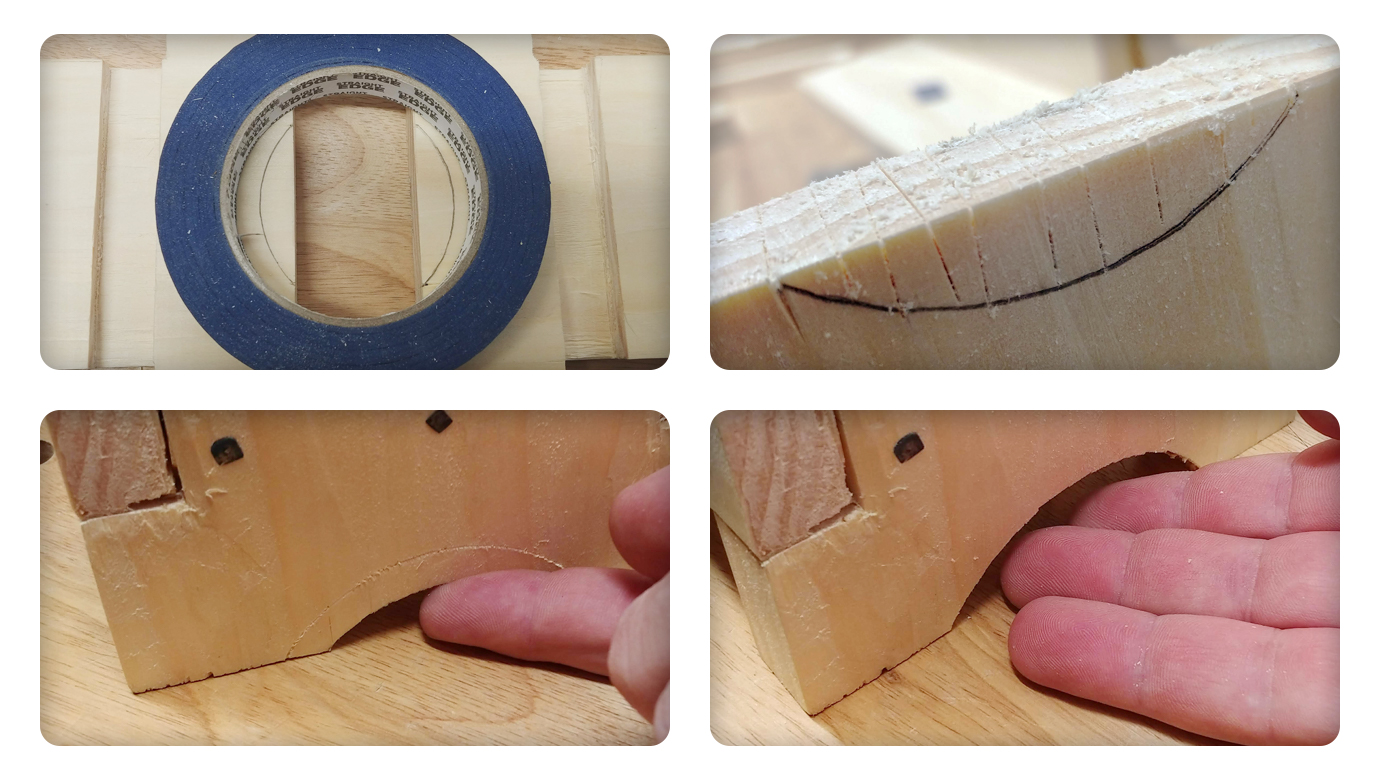
Top Right; Vertical cuts will help keep the wood from breaking out when using a chisel.
Bottom: Before and After creating a larger ‘hand hold’ at the legs.
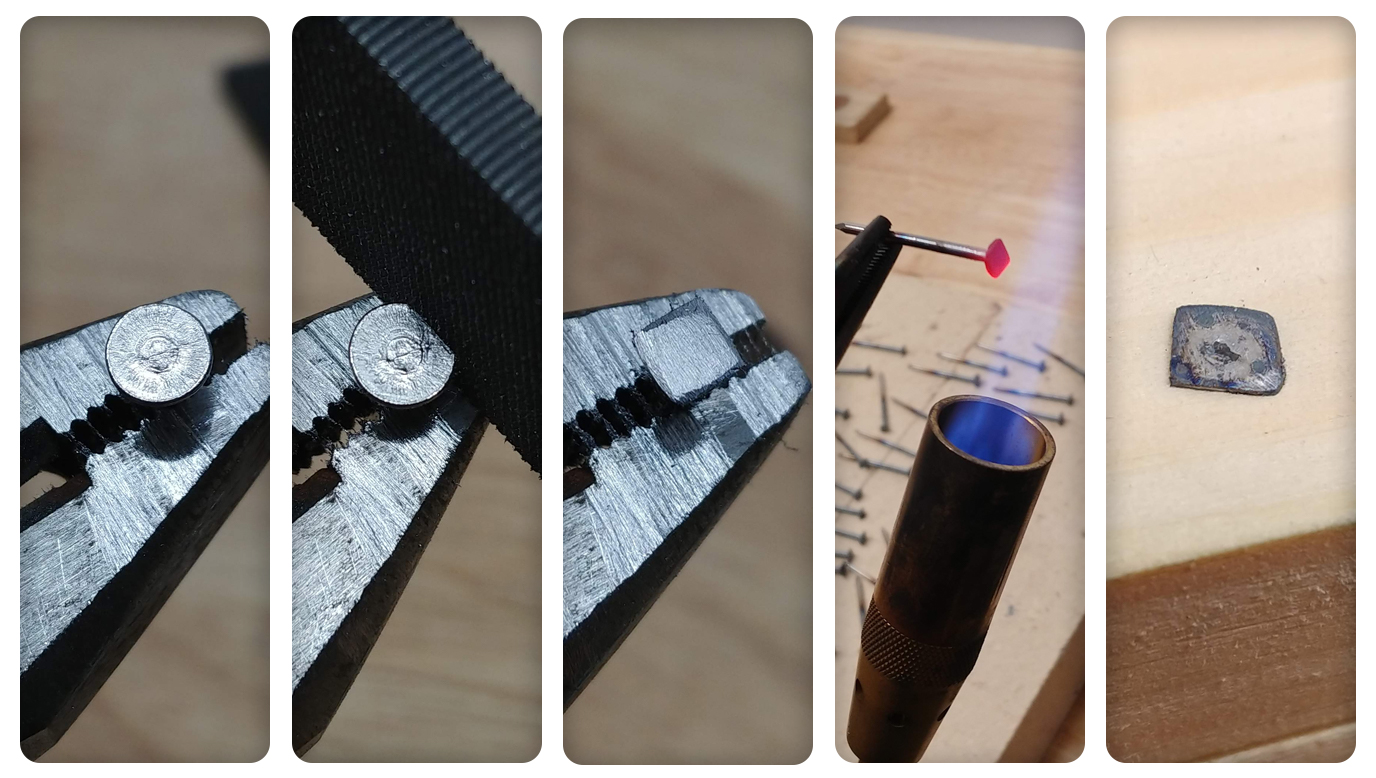
The Nails: Period nails are much different than those we have today. I didn’t have the time to find hand made nails for this project but I did modify some to ‘look the part,’ using a file and torch to square the head and blacken it up. (I have another method I am going to try soon which may produce better results and I will report back with results.) It is important to note that these are ‘steel’ nails and not ‘galvanized’ which would produce some pretty bad fumes.
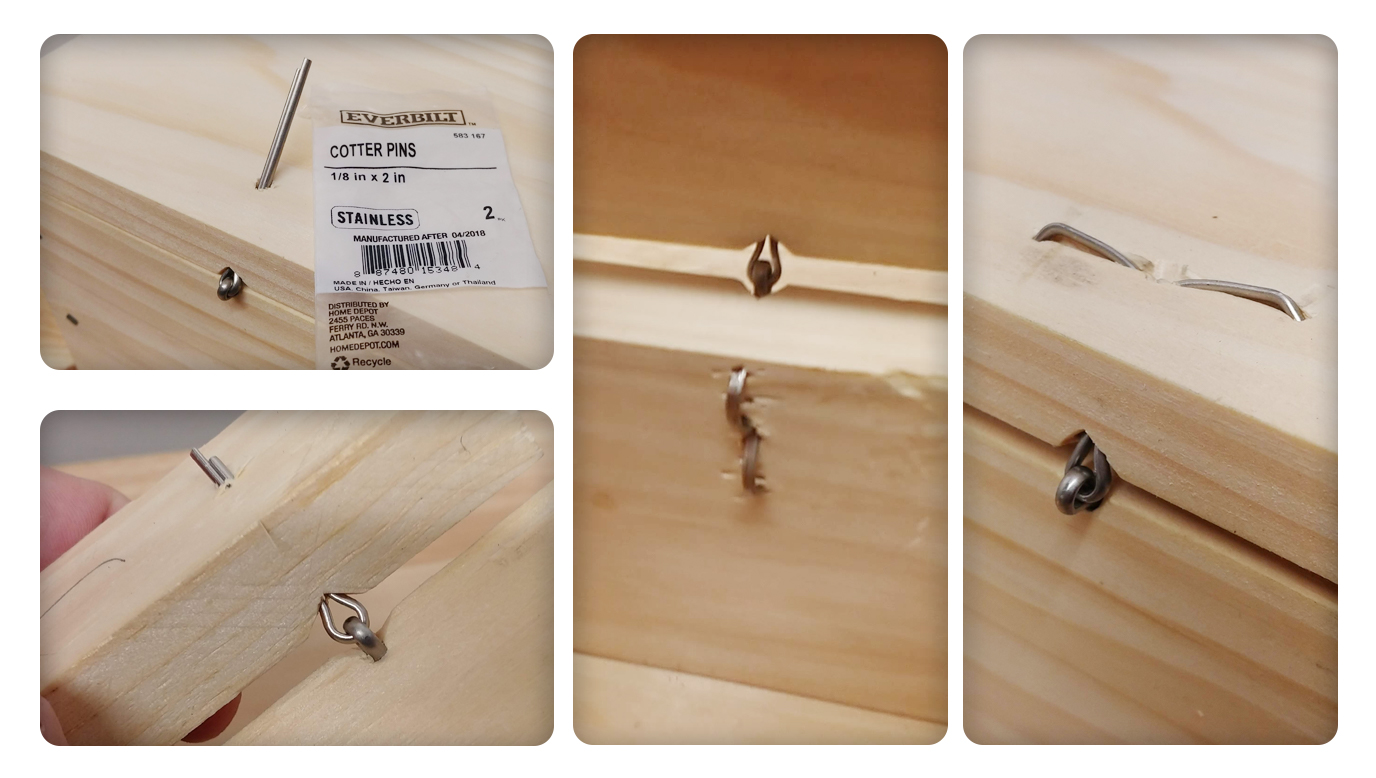
The Hardware: The Snipebill Hinge is a very period example of a simple hinge. These particular ones are made from two cotter pins attached together. The small V notch in the corner of the board is a tip to help things sit proper. That said, these were a pain to bend and bruised the soft pine in many places. The next time I will try softening the metal with a torch first, as well as installing them prior to assembly.
The latch I did purchase at the store for this project and I was unable to make corner braces in time for this project – but that isn’t to say I didn’t try a quick test.
Finishing Touches: Once it was all together and looking great, I did take a sharp chisel to some edges to clean up a few places that did not line up as well as I would have liked. I hit some areas with some sandpaper and as the owner is going to paint it, I left any sort of finish off.
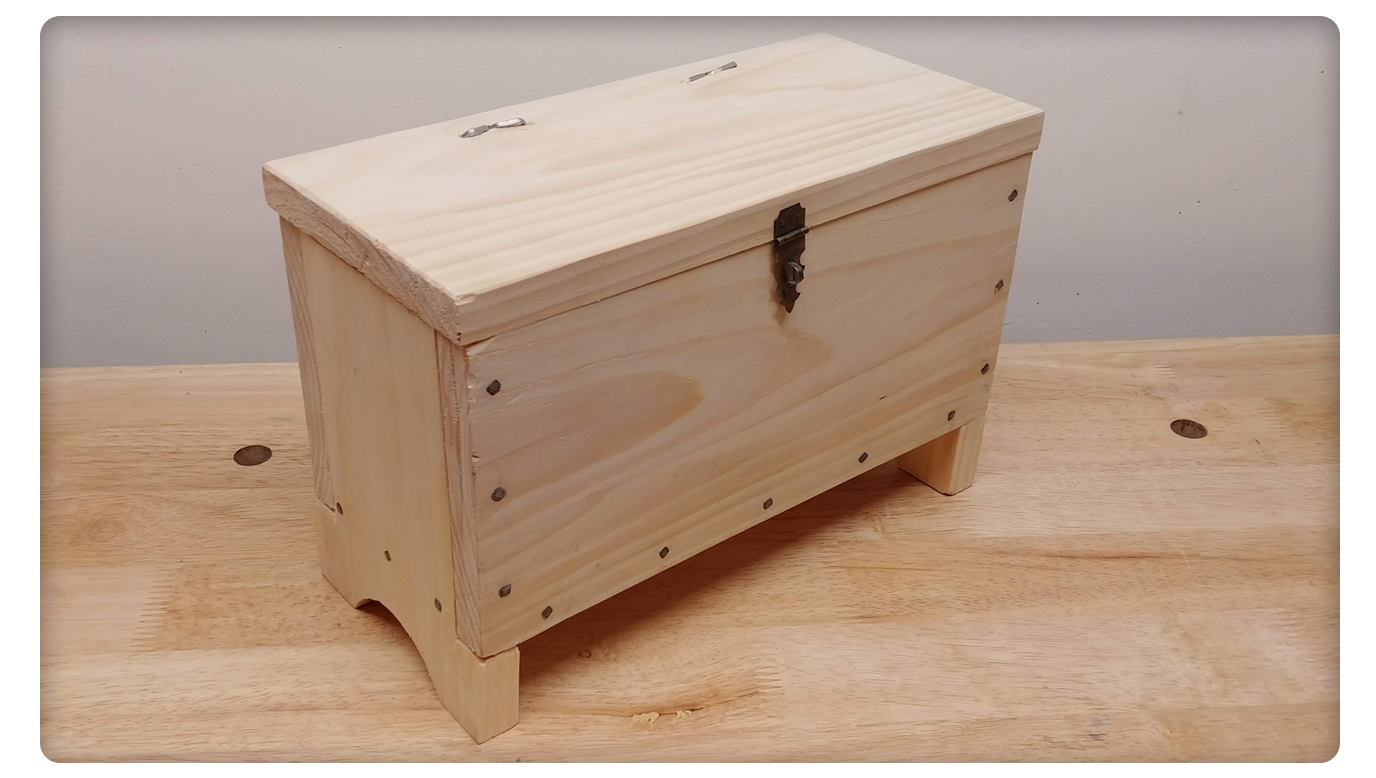
In the end, I am very happy with the results. I need to practice cutting boards a bit straighter and planing them a bit smoother. Another trick I learned after this build is to cut the sides longer, and them trim them once they have been secured into place which I am likely to try on the next one. I was very happy to use a ruler very little and used dividers, straight edges, and marking gauges to layout the size and position of nails and hardware. I did try making a ‘layout sector’ in the middle of this project and only lost one day on that yet to be finished project but that, is for another blog post and another time.
- The Met Cloisters: Read more about the Siege of Orange box on the Met website here.
- Keziah’s Blog – One foot on Sea and One on Shore
- “Föremål 107095. SHM 21592:132” [Object 107095. SHM 21592:132]. www.historiska.se. Swedish History Museum. Retrieved 02 May 2019.
- Meridian School of Carpentry – A Facebook Group – “we are here for the weekend woodworker who has a busy life schedule, but would like to make stuff to improve their encampment”
